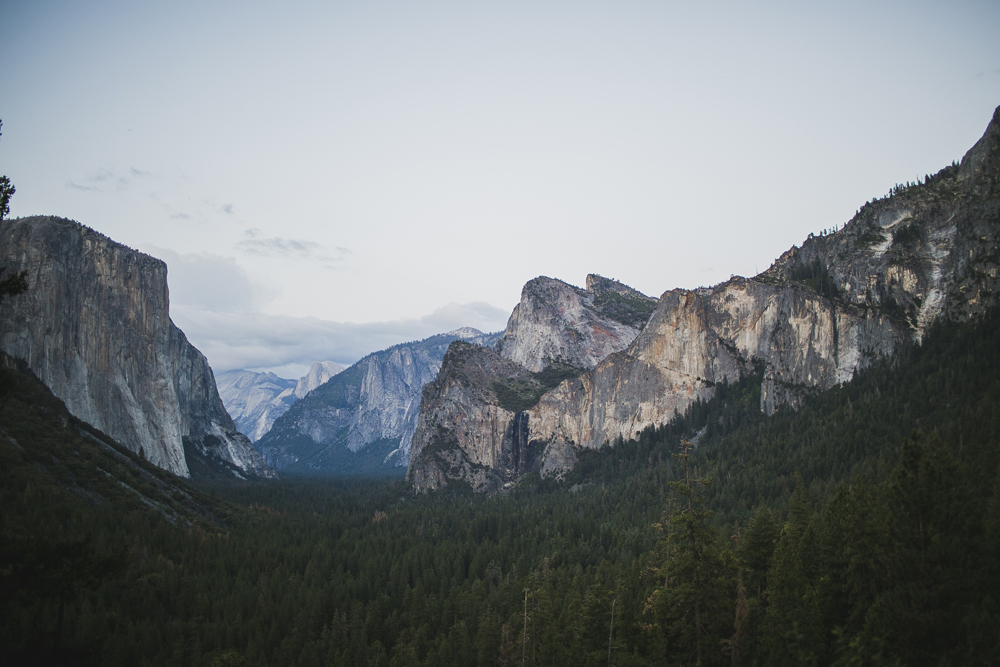
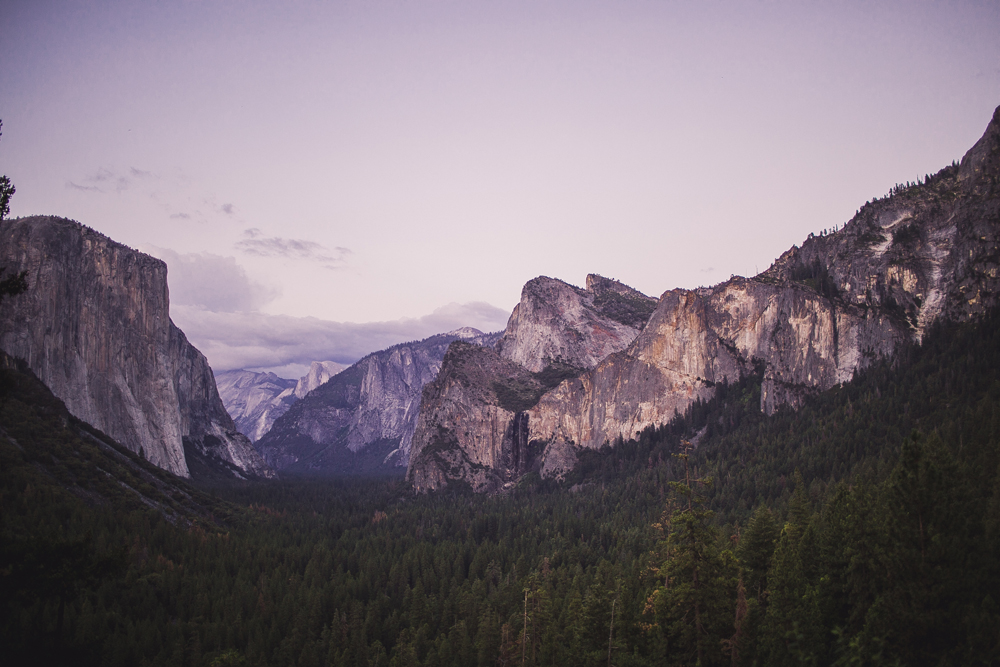
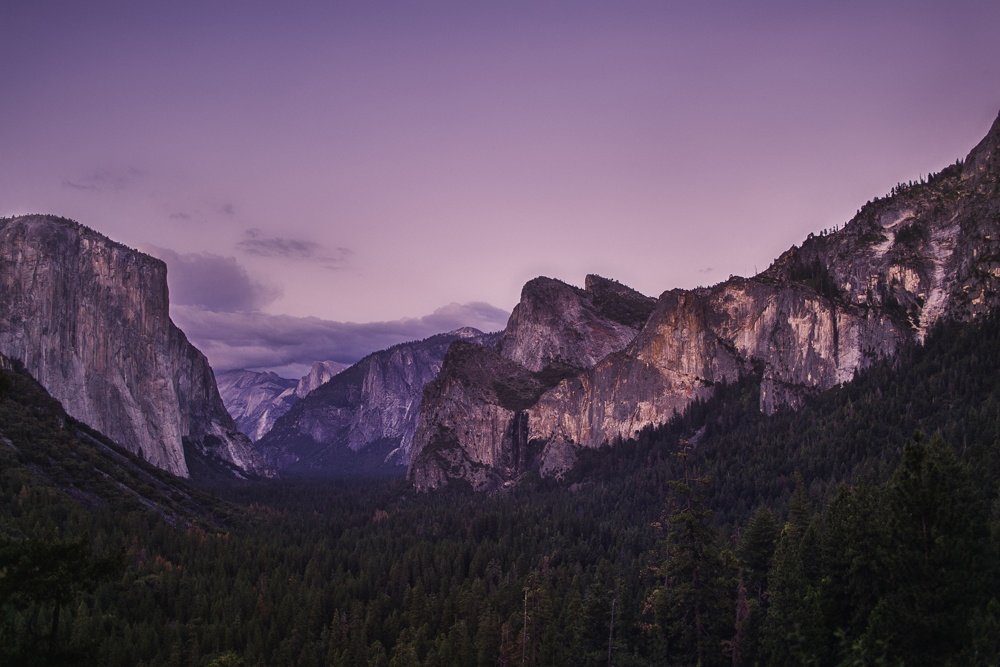
Above is the final photo, a shot I took at Yosemite National Park at the Tunnel Viewpoint during blue hour earlier this year. I spent some extra time editing this photo (more time than I usually spend editing!) and tried to have some fun with it, altering the original photo to make it look completely different to the photo straight out of the camera. I put together a speed edit video to show you my editing process and a tutorial to go along with it to show you what steps I went through to create this final image.
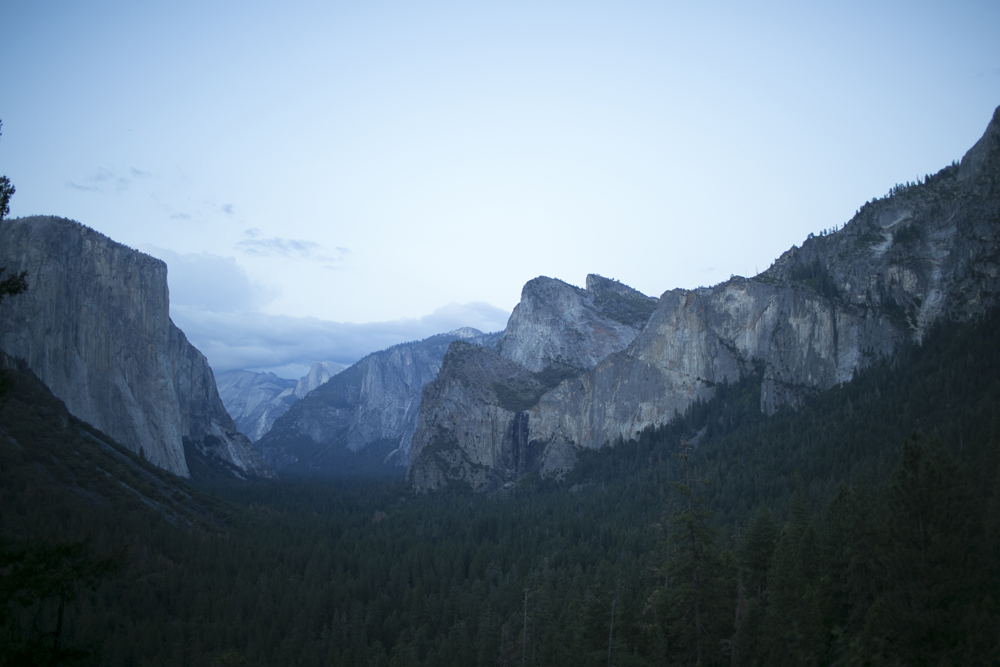
01. Straight out of the camera // Above is the original image I photographed of Yosemite National Park, Tunnel View - straight out of the camera with no editing whatsoever just yet. Here are the technical details of the photo and how I shot it:
Camera Canon 5D mkiii
Lens Canon 35mm f1.4
Time During blue hour (just after sunset but before dark)
Shutter 1/320
Aperture 1.4
ISO 500
Photo format RAW
02. Base Adjustments // I've imported my photo into Lightroom to start the editing process. The first thing I like to do to an image is adjust the tone and white balance. I start by adding a simple S-Curve to the image, then I bring the exposure down, the highlights down to bring out the sky and the shadows up to bring out the trees. These are my current settings below:
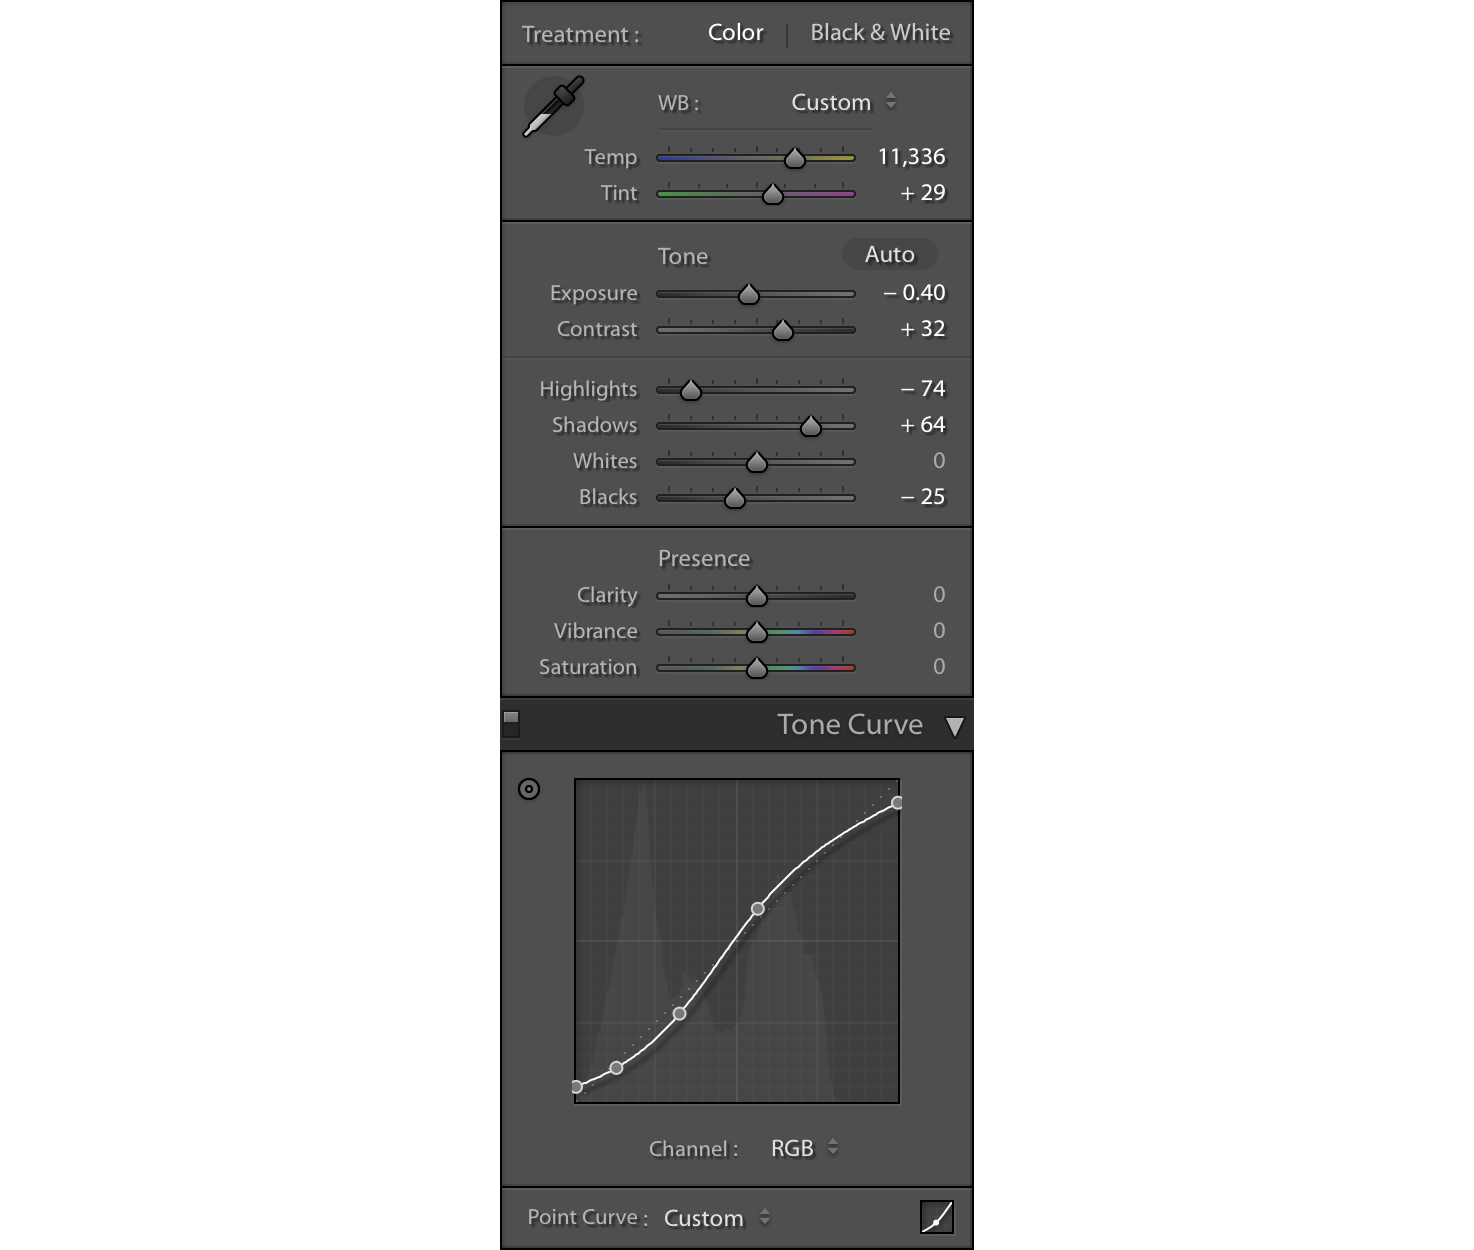
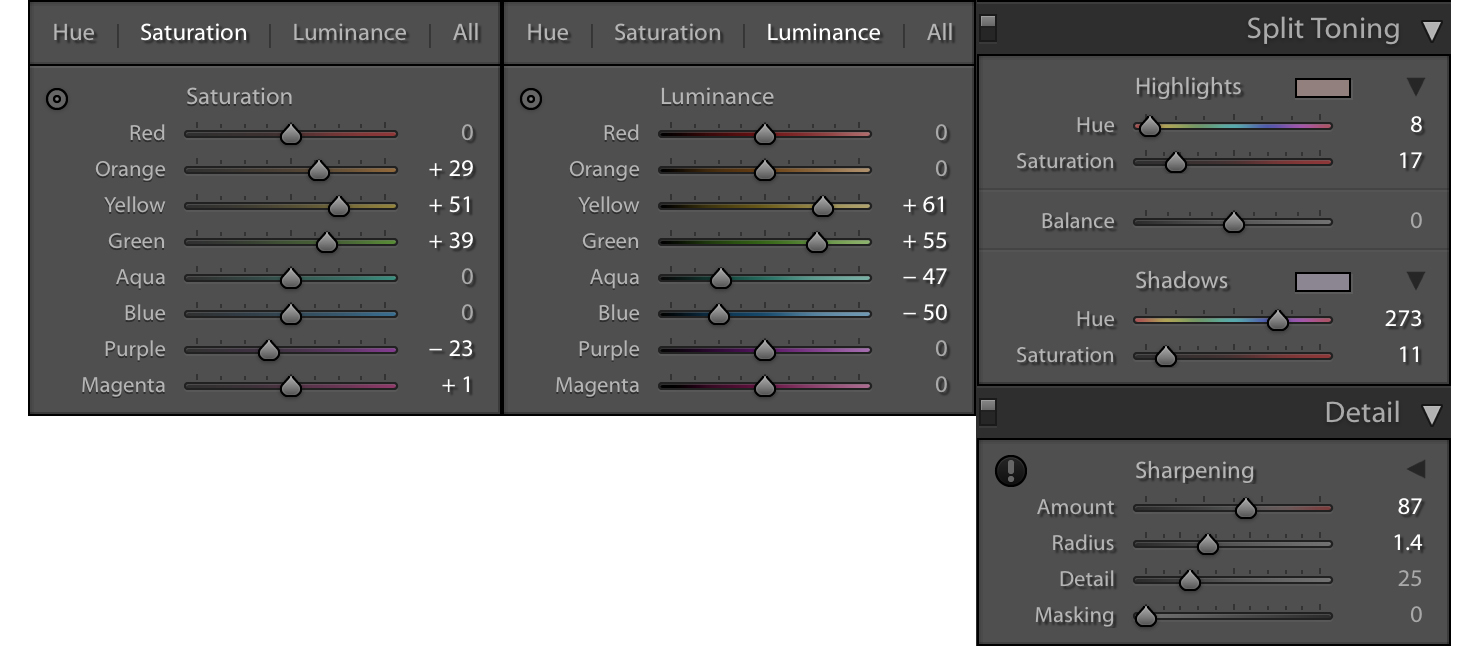
03. Colour Adjustments // The next step of the process is to adjust the colours. While I love the original blue tone to the photo, I like to treat these editing tutorials and videos as a time where I can exaggerate and process images a lot more than I normally do. So in this case, I'd like to give this image a pink/purple post-sunset hue.
To do this I'm going to start by pushing the white balance warmth a lot further than when I first opened and started making adjustments to my image in Lightroom. I'm also going to bring the tint up to about +29 so the photo has more of a pink hue. Then I'm going to move onto the split toning to add purples to the shadows of the image and pinky/reds to the highlights. I'll also take the time to sharpen the photo at this point as well. These are my current settings below:
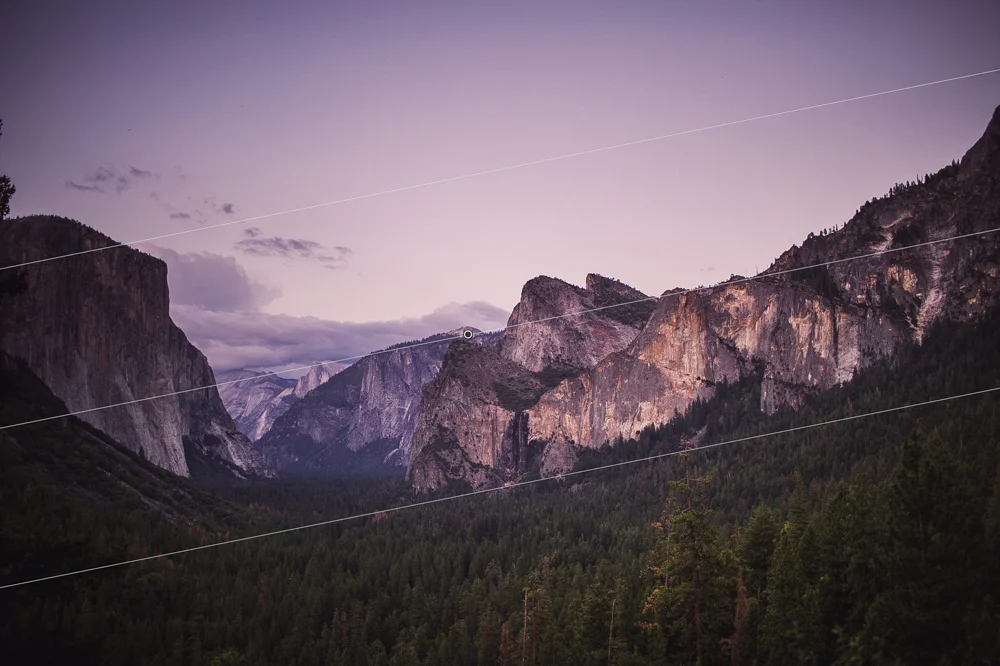
04. Graduated Filter // Next, I'm going to drag a graduated filter over the sky of the image to bring down the highlights even more. The only settings I'm going to change with the adjustment layer is to bring the exposure down by about -95.
Since you can only apply a graduated filter in a straight line, the lower exposure affects the mountains in the photo. You can especially see this in the mountain to the far left of this photo. While in the same graduated filter settings panel, I'm going to use the brush tool to be able to get rid of the lower exposure affecting the mountains with more precision.
06. Final Touches in Lightroom // One last thing I like to do to landscape images photographed with a wide angle lens is to use the Lens Correction tool in Lightroom. Under the Profile tab, I'm going to tick the Enable Profile Correction box. Lightroom automatically detects what lens and camera your photo was shot with and fixes it up for you. If it doesn't, you can go through the dropdown menu to select what camera and lens you used to take your photo and manually remove the lens distortion and vignetting.
Once I've done this, I will do one last sweep of all my settings and tweak until I'm happy and export the photo to Photoshop.

07. Healing Brush Tool // Once I'm in Photoshop, the first thing I'm going to do is remove the two tree branches that are bleeding through in the left side of my photo using the healing brush and stamp tool. To remove the branch over the mountain, I'm going to sample the rock texture and remove it with the healing brush tool. To remove the branches in the sky, I'm just going to use the stamp brush tool at a high opacity (around 50%) and sample patches from the sky.
I'm also going to do a quick sweep of the entire image with the dodge and burn tool to selectively increase the contrast in the photo. I use the dodge tool first with the range set to midtones and the exposure at 20% and brush over sections of the mountains and trees that I think need to be brightened up. Then I use the burn tool at range set to shadows and exposure at 20% to increase the blacks in the image.
The patch of trees at the bottom of the right hand corner keep distracting my eyes, so I'm also going to use the burn tool at range set to midtones and exposure still at 20% to darken them and help them blend in with the rest of the forest.

08. Selective Colouring // Looking at the image overall, to me the trees don't really look like they are fitting in with the rest of the colour scheme. I use the Lasso Tool to make a rough selection around the trees and feather the selection by about 200 pixels. I then use the RGB Curves tool to remove the greens in this part of the picture and add a little more of a blue tinge so it's fits in with the scene.
Again, the trees in the bottom right hand corner need a little more work, so I'm going to make another feathered selection around this area and further remove the green and red tinge.
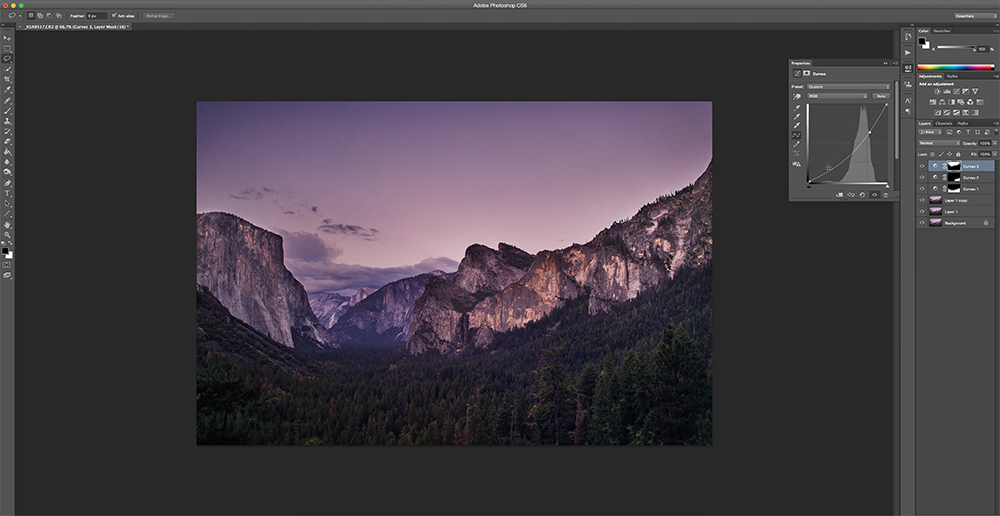
09. Bringing Depth to the Sky // Next I want to focus on bringing the sky a little more life. Although we've already brought the highlights down in Lightroom, the sky could still be darker to make the overall feel of the photo a little moodier. I'm going to create another feathered selection around the sky and use curves to bring down the highlights. You can see this in the screenshot above. Once I'm happy with the tone of the sky, I'm going to use the mask on the adjustment layer to brush out where my selection has gone over into the mountain.
In the original image the sky was already quite over-exposed, so bringing down the exposure as much as we did has affected the quality of the image in the sky area. I'm going to make another selection around the sky and apply a Gaussian Blur filter to smooth out the patchiness. With the same selection, I'm going to then add a black and white grain at about 2% strength to help the sky blend in with the rest of the image again (Filter > Noise > Add Noise). The noise also helps to remove any banding that might happen with the sky being a solid colour gradient.
10. Final Touches // While I feel like this image is almost finished, it's not quite there yet. The right hand side of the image still looks too bright and distracting, so I'm going to create another feathered selection and use the curves tool to bring the exposure down. I will also apply one final overall RGB Curves layer to adjust the colours further as well as a Colour Balance layer before finishing off my photo.
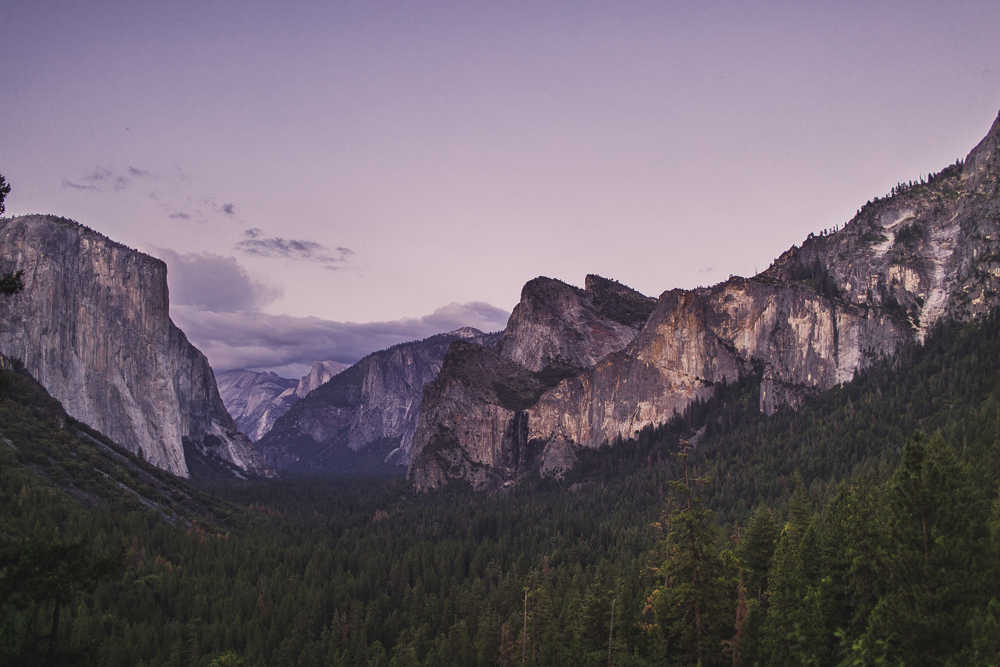
Here we have the final product below!
I hope you've enjoyed this speed edit video + tutorial! If you have any questions, please leave them in the comments section below!
Please subscribe to our channel! We release 2 new videos a week including Lightroom Tutorials, Photoshop Tutorials, Digital Film Preset Features, Fashion Shoot Behind the Scenes & vlogs!